
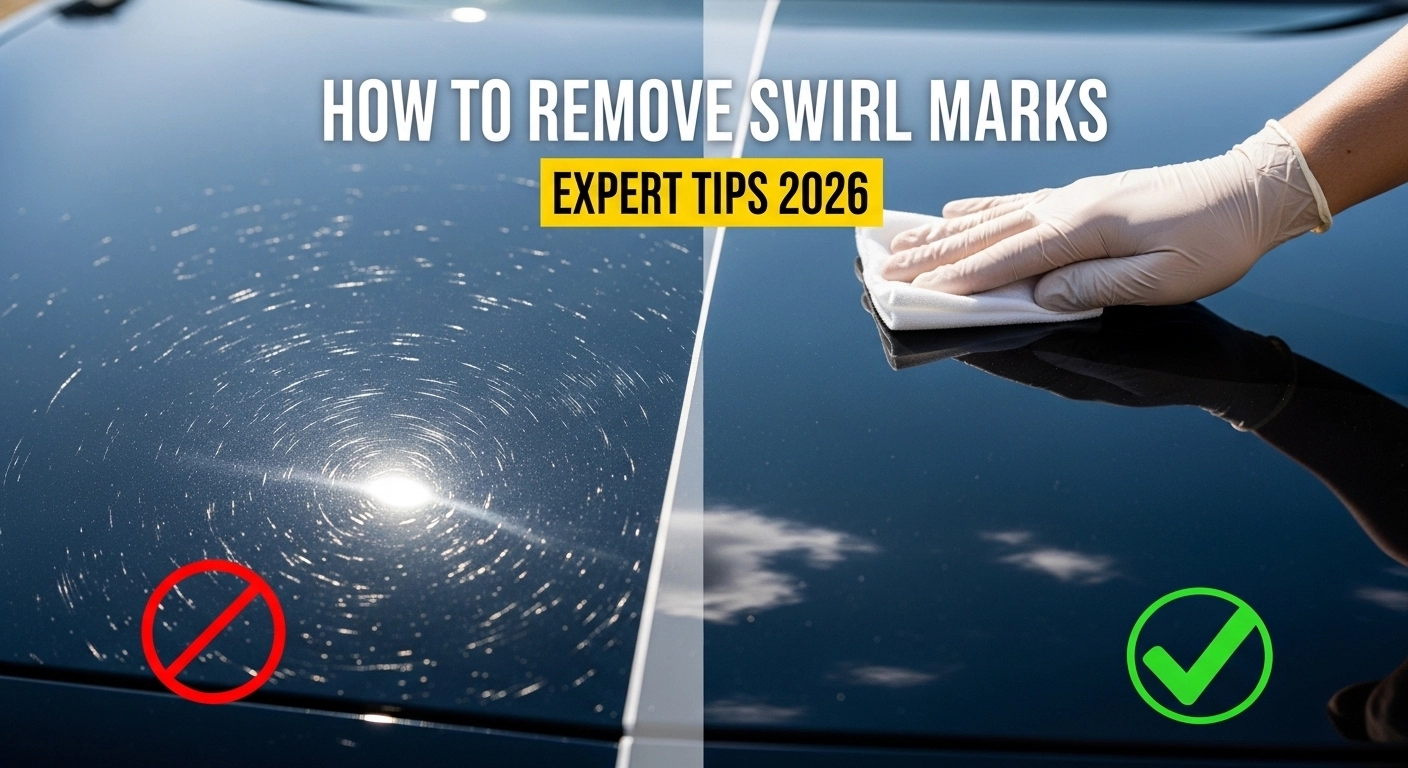
Swirl marks are one of the most frustrating and common paint imperfections that car owners face. Those fine, circular scratches that become especially visible in direct sunlight can make even a well-maintained vehicle look aged and neglected. The good news is that swirl marks can be removed, and in most cases, you can achieve professional-level results at home with the right tools and techniques.
In this comprehensive 2026 guide, we will explain what causes swirl marks, how to assess their severity, and walk you through both DIY and professional methods for restoring your paint to a flawless, mirror-like finish.
What Causes Swirl Marks?
Swirl marks are micro-scratches in the clear coat that reflect light in circular patterns. They are caused by anything that drags abrasive particles across the paint surface. The most common causes include improper washing with dirty sponges or towels, automatic car washes with spinning brushes, buffing with a dry or contaminated cloth, using low-quality or expired polish products, and wiping dust off a dry vehicle. Even seemingly harmless habits like drying your car with a chamois leather or using a California duster without proper technique can introduce swirl marks over time. Dark-colored vehicles show swirl marks most prominently because the scratches reflect more light against the darker background.
How to Assess the Severity
Before attempting any correction, you need to understand how deep your swirl marks are. Run your fingernail perpendicular across a scratch. If you cannot feel it catch, the mark is likely only in the clear coat and can be polished out. If your nail catches, the scratch may be deeper and could require more aggressive correction or even professional repainting. Use a bright LED flashlight or an inspection light to examine the paint in a shaded area. This will reveal the true extent of the damage and help you determine whether a light polish, a medium-cut compound, or a multi-step correction process is needed.
Method 1: Hand Polishing for Light Swirl Marks
If your swirl marks are light and only cover a small area, hand polishing can be effective. Apply a small amount of finishing polish to a clean microfiber applicator pad. Work the product into the affected area using overlapping straight-line motions, not circular movements. Apply moderate pressure and work the polish until it becomes clear, then buff away the residue with a clean microfiber towel. Hand polishing is the safest method because it removes the least amount of clear coat. However, it requires significant effort and is impractical for full-vehicle correction. It is best suited for isolated spots or touch-up work between professional details.
Method 2: Machine Polishing with a Dual-Action Polisher
For moderate to severe swirl marks covering the entire vehicle, a dual-action polisher is the most effective and safe tool for the job. Unlike rotary polishers, dual-action machines oscillate and rotate simultaneously, which makes them much more forgiving and virtually eliminates the risk of burning through the clear coat for beginners. Start by selecting the right combination of pad and compound for your paint condition. For light swirl marks, use a fine finishing polish with a soft polishing pad. For heavier marks, begin with a medium-cut compound and a medium pad, then follow up with a finishing polish to refine the surface.
Work in small sections of about two feet by two feet. Apply three to four pea-sized dots of compound to the pad, spread it across the section at low speed, then increase to medium speed and make four to six slow passes using overlapping straight-line motions. Wipe away the residue with a clean microfiber towel and inspect under bright light. Repeat if necessary, but avoid excessive passes on the same area to preserve clear coat thickness.
Method 3: Professional Multi-Step Paint Correction
For severe swirl marks, deep scratches, or heavily oxidized paint, professional multi-step paint correction is the recommended approach. This process typically involves two to three stages: a heavy cutting stage to remove the deepest defects, a medium polishing stage to refine the surface, and a final finishing stage to bring out maximum gloss and clarity. Professional detailers use paint depth gauges to measure clear coat thickness before and during the process, ensuring they remove only what is necessary without compromising the paint’s structural integrity. A full multi-step correction on a mid-size sedan typically costs between three hundred and eight hundred dollars, depending on the vehicle’s condition and the shop’s pricing.
Protecting Your Paint After Correction
Once you have removed swirl marks, protecting the corrected surface is essential. Applying a ceramic coating or high-quality paint sealant immediately after correction locks in the results and prevents new swirl marks from forming as quickly. Without protection, your freshly corrected paint is vulnerable to the same contaminants and improper washing habits that caused the original damage. Adopt the two-bucket wash method, use microfiber towels exclusively, avoid automatic car washes, and establish a regular maintenance routine. These habits will keep your paint looking pristine for years and ensure that your investment in paint correction was not wasted.
Swirl mark removal is one of the most satisfying aspects of car care. Seeing your vehicle’s paint transform from dull and scratched to deep, glossy, and mirror-like is incredibly rewarding. Whether you choose to tackle it yourself or hire a professional, the key is understanding the process, using the right products, and protecting your results going forward.